JTWO Navigation

Showing posts with label Tips. Show all posts

Friday, May 6, 2016

SSS Experiments

Sorry I've not posted in awhile, hopefully that will change with the Everyday Art project.  In case you hadn't seen it the idea is to create a piece of art from start to finish every day.  Doesn't have to be good it just has to be started and finished.  Even though the artist Beeple (Mike Winklemann) titles his site Beeple-Crap, his work is anything but.  That probably has alot to do with the fact that he's been doing it for over 10 years. 3293 consecutive days of publishing new work every day.  As my Art History professor at A&M, Joe Hutchison would say "But I digress . . ."

The last week and a half I've been messing around with Sub Surface Scattering.  Fascinating subject, hugely complicated material with lots of settings that I have NO IDEA what they do.  The documentation from Chaos is great at giving the techincal definition of what each setting is but LOUSY at telling me what it DOES. Or why, or how, or simply what to expect with certain values. So here's me at 10 pm at night mashing buttons and changing settings like a great dane in front of a computer hoping to get something in the next 2 hours that doesn't suck completely because I have to post it even if it does.  Fortunately my first two attempts came out pretty well.  I'm going with beginners luck.


The Fast SSS shader has 12 presets. The majority of the renders I've done use either the Milk (whole) or Milk (skimmed) presets with a few changes to scatter radius and color. I started to be able to produce closer to what I wanted without a huge amount of trial and error, but there was still some guesswork involved.


So I decided to sit down and make some notes on the various settings I'd played with.  I put together a video of the results and it can be found on Vimeo. It's by no means a definitive tutorial on SSS or Vray, but if you're like I was a week ago with no idea of what settings do what, this may help get you started.

Check Out the Video Here

Friday, November 14, 2014

Creating Refraction Masks

Wrapped a project yesterday where I was doing alot of Photoshop retouching of renders.  One area they wanted to change the color of was seen through bunch of glassware.   So I figured I'd write up a quick how to.


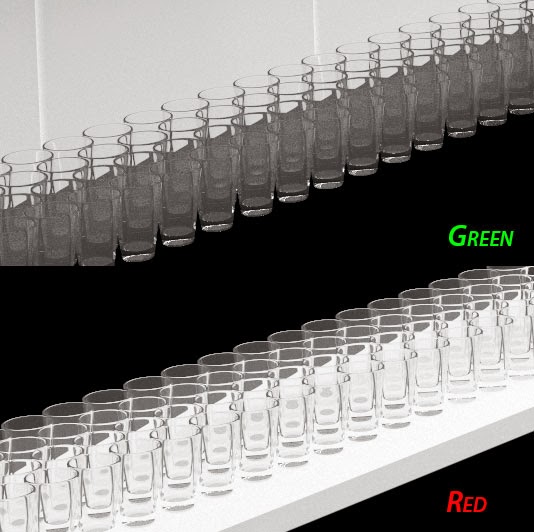
Went into the scene and changed two materials.  The back area (green) and the bartop (red)  Standard Max material with either pure green or red in the diffuse.  Thats it.  Hit render.

After that I pulled the render into Photoshop and copied the red and green channels into their own layer

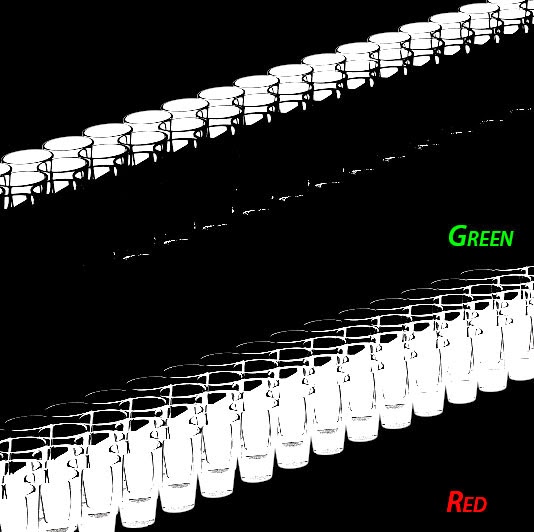
Added a Levels Adjustment layer and crushed the blacks and the whites.
After the Levels Adjustment.
Combined these with a mask of the glasses (Ivan Tepavicharov's RenderMask script - an awesome tool to create mattes of objects)

And that's it.  Now you can color correct materials behind glass.

Monday, September 29, 2014

A Little Weekend Work

This was actually done about two weeks ago, but am just getting around to posting it. There are several blogs I follow about architectural models, and found this photo of a model credited as Mansilla + Tuñón Architects concept of Museo de Automoción.

As a lighting study and test for NPR styles of rendering, I replicated the image in 3ds Max and Vray. Matching perspective with all circles and no scale/dimensional reference was tricky.  There is a little bit of Vray's Toon effect in the AO pass.

Also I wanted to mention a technique that is pretty simple, but haven't seen talked about anywhere.  Using the render itself (inverted) as a mask on the AO pass to increase accuracy.  AO passes add back some detail that GI washes out, but the effect of an AO should not be seen in areas exposed to direct light.  So I took the base render, adjusted the levels, inverted and applied as a mask to the AO layer.  This will also work with an inverted lighting pass or a shadow pass.