My primary client is a kitchen equipment manufacturer. 98% of what they fabricate (and that I render) is made of stainless steel. So I am constantly tweaking my stainless steel shader. After a number of years working in Mental Ray, I switched all their renders to Vray.
I developed a shader based off everything I had learned from Mental Ray, and combined it with info from
Grant Warwick's shader creation techniques. After having had it in production for a few months, and really getting to see it in various scales and scenes, I had alot of notes on what I wanted to update, and I recently took several days off after completing a large project to do just that.
The shader is a Vray Blend material that uses 3 layers of materials. The layers are then blended with a falloff map with a custom curve drawn to show a different shader based on viewing angle. The idea being that a materials reflectance increases with the viewing angle. Here's an example to illustrate what the material is doing.
The red areas are those facing more or less directly to the camera. The blue areas are those almost 90 degrees to the camera. The green are the values in between. When this is applied to the stainless steel shader, the red areas show the least reflective of the material and the blue show the most reflective.
The next issue is that nothing is perfectly flat. I've been using a noise map in the bump slot of the shader to create the "wobble" found in sheet metal. This is set to a world space so no matter what mapping coords you place, the wobble will be random and consistent. It also allows smaller objects to not have very much distortion and large ones to have more.
The 3 renders are each of a different scale (left to right is largest to smallest), but use the same mapping coords. The brushed texture is very small and fine on the large model and larger and more visible on the small model. The edges of all 3 are chamfered at 1/16" The render scene is a modified version of Grant's. Download the shader
here.

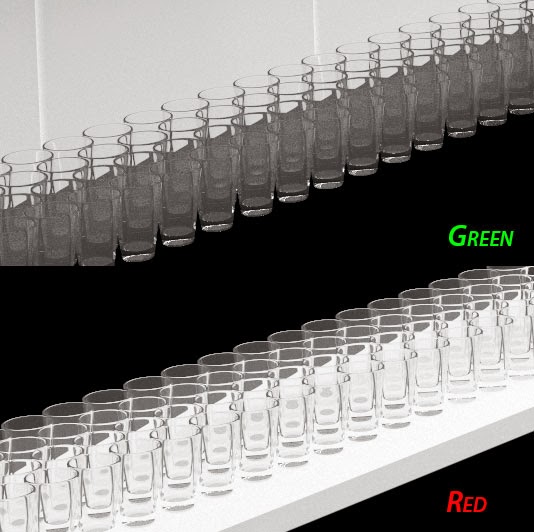 After that I pulled the render into Photoshop and copied the red and green channels into their own layer
 After the Levels Adjustment.
 Combined these with a mask of the glasses (Ivan Tepavicharov's RenderMask script - an awesome tool to create mattes of objects)


